Monday, December 16, 2013

Dec. 15th- Entropy, Enthalpy, and much more

We're back! Since the start of the 2nd Trimester, we have been learning many new and intriguing concepts. We started off learning a little bit about Thermochemistry and Bond Enthalpies. We learned about the four ways to calculate a certain bond enthalpy and whether these processes are endothermic or exothermic. We then learned all about bond entropy and Gibbs Free Energy. Along the way, we learned about Aqueous solutions and Precipitation reactions also.

The first thing we learned about in trimester 2 was the concepts of thermochemistry and bond enthalpies. We learned that enthalpy is practically the heat lost or gained in the system as seen below.
When the change in enthalpy is positive, the process is endothermic as opposed to negative change identifying with the process as exothermic. We also learned four methods to find the change in enthalpy. These four ways were discussed very in depth over a serious of Lectures and Lecture Quizzes. The formula using average bond energies was simply the (positive) Total Bonds Broken plus the (negative) Total Bonds formed. The res of the formulas can be found with their correlating Power Points at the links below.

Calorimetry Formula
Hess's Law and Enthalpies of Formation


We then went on to learn that entropy is a measure of the most probable distinguishable microstates or degrees of freedom available to a system. To calculate the change in entropy, you simply find the sum f products minus the sum of the reactants with stoichiometric standard entropies. We also found out how to find whether a reaction was spontaneous of not by the table below. The formula for Gibbs Free Energy can also be seen below.


We then went on to learn about Precipitation reactions and Net Ionic equations. To find these Net Ionic equations, you basically find the elements that are soluble in water and take them out of the equation leaving only the reactants that are insoluble in water. Some soluble compound include Na+, K+, NH4+, and NO3+.

Overall, we learned a lot of new concepts and important information on Entropy and Enthalpy over the past few weeks. I still have a few unanswered questions regarding both concepts but once I prepare for the Friday test by reviewing the Power Points, I'm sure the information will become much more clear. My participation in class these past few weeks have not been very good at all and is something I really need to work on moving forward. On a scale of 1-5, I would rate my understanding at a 3 of the information we've learned over the past few weeks. I need to study pretty hard this week in order to be prepared for the test. Once I review these basic concepts, the test should be a piece of cake!

Monday, November 11, 2013

11/10


This week, we learned many different concepts from Vapor Pressure to Lattice energy to Liquids and Solids. We also continued to learn about how the IMF forces affected these basic concepts and what other forces or bonds held these molecules together.

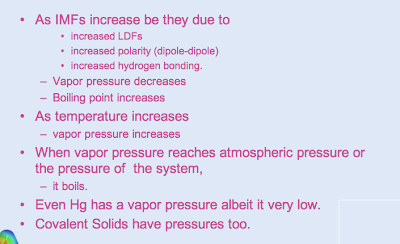
The first main concept we learned about was vapor pressure. Vapor pressure is the amount of gas of a compound that is in equilibrium with the liquid or solid. This means that if IMFs are weak in the compound, molecules can more easily break out of the liquid or even solid into the atmosphere. This concept of vapor pressure is used to explain why water evaporates when left out for a few hours. The link and images below give a better in-depth description of what vapor pressure is and what are some common trends that go along with it.


IMFs and Vapor Pressure in Depth


Later on in the week, we learned about Lattice energy in molecules. Lattice energy is the amount of energy required to completely separate a mole of a solid ionic compound into its gaseous state. The main things to know about Lattice energy is that it increases with the charge on ions and decreases with the size of these ions. Also, as Lattice energy goes up, so does the element's boiling point.

The last thing we learned about this week was about the conductivity of different compounds and their correlation with trends such as boiling point and melting point. We conducted a whole lab testing the conductivity of different substances and engaged in a rather large discussion over these concepts. We learned that testing the conductivity of a substance is really only testing the ability of the electrons in that substance to move. We worked with our table groups to complete the lab and settle any unresolved questions.

Overall, this week flew by pretty quickly. My participation this week hasn't been as great as it could be and I need to work to improve that in the upcoming weeks. I am quite nervous for the test on tuesday because I am not entirely sure about all of the concepts we will be tested on. I do not know the material very well and will need to study pretty hard tomorrow to get all of these concepts. The end of the tri is looming over us and I cannot be more excited!!!


Monday, November 4, 2013

11/4


This week, we learned all about intermolecular forces. We completed a few POGILs this week on Intermolecular forces and Water learning about the four different types of intermolecular forces while also learning what the difference between intramolecular and intermolecular forces were. During the week, we completed several lecture quizzes on each of the four different types of intermolecular forces. As the week came to a close, we began working on the Lecture 23 worksheet and were introduced to liquids and solids.

The first thing we learned about in this unit was the various types of intermolecular forces. We spent two days reviewing a POGIL and had multiple lecture quizzes on this subject because it is so important.  This POGIL first taught us the correlation between increasing molecular weight and increasing intermolecular forces with increasing boiling point of molecules. It also taught us the difference between intermolecular and intramolecular in that intra means within a molecule where inter is bonding two molecules together. The POGIL also introduced us to the 3 main types of intermolecular forces which are hydrogen bonding, dipole-dipole forces, and induced dipole-induced dipole or London Dispersion Forces. Links further explaining each of the forces further in depth are listed below.


The strongest of the forces, Hydrogen bonding, was a huge focus in the lessons this week. We learned all about the different types of forces present in each molecule. The pictures below illustrate the strengths of the different forces, an example of some molecules with multiple charges, and a little explanation of what hydrogen bonds really are. As seen below, London Dispersion forces are found in every compound. However, dipole-dipole forces are only found when there is a dipole in the molecule whereas there must be and O, N, or F present next to the H atom for Hydrogen bonding to occur. Dipole-induced dipole forces are not very commonly found s we id not really address them this week.


The water POGIL helped us get a very good interpretation of what hydrogen bonds are, when, and where these hydrogen bonds occur. We spent only a few days working on it though before moving into liquids and solids which we started this weekend. We completed a lecture quiz on both liquids and solids on Sunday and I believe we will go much further in depth with that subject next week.

Overall, my participation this week was very good. I understand most of the concepts from this week pretty well besides the Dipole-Induced Dipole forces. Those were very confusing to me. I think I still need to work on memorizing the charges and their properties a little bit more. I am excited to see where we move on to next week!


Monday, October 28, 2013

October 20 - October 25

This week was a very jam-packed week for us Chemistry students. We began the week with a slight review which transitioned us to our test on Polarity and Electron/Molecular domains. After our test on our bonding unit we had a nice relaxation day in which we enjoyed Mole Day. Later in the week, we got back down to business with a pretest/practice AP test, and finished off with two POGILS on the Ionic Bond and Metals.

To review for the the test on Tuesday, we worked on a review packet (found below) we were given over the weekend and even white-boarded a few problems as a class. We also had further review materials online. Some of these included our past lectures, the answers to different POGILS, and even extra review with Hotpot quizzes. The following day, we took the test. Overall, it was not too challenging. The questions were slightly difficult and I made many stupid mistakes, but I knew most of the material pretty well overall. 


From there, we moved on to celebrate Mole Day (which unfortunately I was absent for :( ). From what I heard, it was a very exciting day filled with cookies and hot chocolate . This day wasn't all fun and games though. We were given an article that day on the chemistry of paintball and were assigned to write an essay about the importance of polarity and hydrogen bonding in the paintball. This article not only introduced us to polarity and hydrogen bonding, but also gave us a fun and great way to learn about it through something we could relate to. 


We then finished off the week completing two POGILS. Whatever work was not completed in class was assigned for homework. These also helped us to complete a lecture quiz on Metals due that Sunday night.

Overall, this was a week of stress and enjoyment in many forms. My participation overall was pretty good this week. I think I have a very good understanding of the few concepts we learned in this transition week. I am very interested in the chemistry of metals so I am excited to see what we move on to from here!


Monday, October 21, 2013

Hybridization, Sigma/Pi bonding, and WebMo molecules

This week was a very eventful one in Dr. J's classroom. We learned how molecules can be classified using hybridization, what sigma and pi bonding is, and then progressed to complete the VSEPR lab with its new addition of the WebMO molecular models lab. We also reviewed some concepts such as polarity and the dipole moment that weren't very clear before. These concepts were very necessary knowledge we needed to comprehend moving forward towards our test on Tuesday.

Hybridization surprised a lot of people. I had no idea what this was just going off the information from the lectures. As we worked through it in class though, Dr. J came up with a very simple and easy way for me to tell a molecule's hybridization. All we really needed to do was look at our given molecule's central atom. This atom would give us all the information we needed to know. To find the hybridization of a molecule, you need to only look at the number of electron domains in the central atom. If it had two electron domains, the hybridization would be sp.  If it had three electron domains, the hybridization would be sp2. If it had four electron domains, the hybridization would be sp3. You an only classify molecules through hybridization through four electron domains, so if a molecule had 5 domains, you could not classify it through hybridization. Examples of hybridization in molecules different types of molecules be seen below.

Sigma and Pi bonding was also another very confusing subject. The lecture also gave me absolutely no help whatsoever as to comprehending what these bonds are or how they are really formed. However, just as with hybridization, as we went over the concept of Sigma and Pi bonding in class, it became a whole lot more clear what Sigma and Pi bonds really were. Basically, a single bonded molecule would only have Sigma bonds dependent upon how many bonds you have. Take for instance, F2. F2 has one, single bond. This single bond indicates that there is one sigma bond present. A double bond however means that the molecule has one sigma bond and one pi bond. A triple bond on the other hand, indicates that the molecule has one sigma bond and two pi bonds. Take for instance the element C2H2 above. There are two single bonds and one triple bonds. The two single bonds indicate there are two sigma bonds. Add that to the one sigma and two pi bonds present in the triple bond, and you can see that C2H2 has 3 sigma bonds and two pi bonds. The powerpoint below can provide a little more assistance if needed.


The WebMO lab really cleared things up for a lot of people. This lab allowed us to create models of each of the thirteen molecules we had in our lab. Some of these included NSF, H20, and BeF2. From these models, we were able to tell a molecule's polarity, charge, dipoles, shape, and bond angles. The polarity could be seen looking at the molecule's colors when looking at the WebMO diagram. If symmetrical, the colors would indicate overall that the molecule was not polar. If not symmetrical though, the colors would indicate that the molecule is overall polar. We could tell the charge, dipoles, shape, and bond angles by just looking at the diagram and information listed below the model for most molecules.

Overall, I learned a lot about Hybridization, Sigma and Pi bonds, and gained tons of useful knowledge from the WebMO diagrams. My participation overall this week has been pretty good, especially in the WebMO lab. I would rate my understanding of the concepts this week at a 7 out of 10. I got a lot of the information, just not every single bit. I still need to work on the dipole moment of molecules because I am not quite sure how to calculate that still.


Monday, October 14, 2013

10/7-10/13: More Lewis Structures

This week was very uneventful in our AP Chemistry class. We used the first few days to finish up our calculations in our lab conducted last week and to review some important material on molecular geometries. From there we completed two more POGILs having to do with hypervalency, formal charges, resonance, and bond order. We finished up the week with a lecture quiz on Polarity and some more review on how to build some of these more complicated Lewis Structures with expanded octets.

Starting the week off right, we continued to learn about molecular geometries by white boarding and completing our VSEPR lab we started the week prior. This lab helped us really further understand the five types of electron domain geometries. These included Linear, Trigonal Planar, Tetrahedral, Trigonal  Bipyramidal, and Octahedral. In these domains were also sub-domains that can be seen in the molecular geometry pictures below. Our knowledge of these domains from this lab also really helped us complete the VSEPR lecture quiz due that night.
Linear and Trigonal Planar
Tetrahedral 
Trigonal Bipyramidal

Octahedral


We continued moving forward, finishing up our calculations from the lab we conducted a week ago. This became very confusing for me because I had not done Stoichiometry in such a long time. But then again, that's why why have lab partners! My partner and I worked through the calculations in no time to finally obtain the mass percent of Cu in that brass screw solution through both the visual method and the method using the calibration curve. From there, each class entered their final results into a google form where our entire class data was averaged and stored.

The next few days took us back to basics with two new POGILs, working on our familiarity with hypervalency, formal charges, resonance, and bond order. These POGILs focused heavily on formal charges and hypervalency in different types of molecules the most. These areas were really stressed and I understood both concepts very well. To top it off, we had another lecture quiz due that night on Polarity. Unlike formal charges and hypervalency, I really struggled with the concept of polarity. I needed to re-watch the lecture(link below) multiple times before I could grasp some of the basic concepts such as the dipole moment.


We finally finished the week off with some more basic review as a class. We went over how to construct the Lewis structures of molecules like BSF and NSF in our table groups and came together as a class at the end to discuss the correct answer. We also found each molecule's formal charge, electron and molecular domain, and even their alternative resonance structures.

Overall, I feel a lot more confident in my knowledge of the information we went over on Lewis structures this week, but I also had quite a bit of trouble with Polarity and the calculations from the brass screw lab. I still need to work on grasping those concepts of Polarity and may need to watch the lecture over again taking notes. My participation this week was pretty good, but I think it was a little down from my participation the week prior. My ideas have really changed on the concept of hypervalency. At first, I had no idea how it worked, nor could I understand how you could just dip into the d-orbital with extra electrons. This process shocked me at first, but like much of this week's concepts, I now believe it is quite simple. 


Sunday, October 6, 2013

9/30-10/6: Lewis Structures and Brass Screw Lab

          This past week was a very interesting one. We began the week with by talking about our second official lab on the amount of mass percent of copper in a brass screw. This discussion gradually took us to our next main concept which was Lewis structures. We spent the majority of the week learning about Lewis structures through various POGIL activities, while also conducting the our lab experiments on the days we were not learning about Lewis structures.
          On Monday we discussed a very difficult reaction in class that would eventually help us find the mass percent of Cu in a brass screw in our lab. We worked in our table groups and white boarded out the formula see below as a class. Coming together at the end, Dr. Finnan finally explained how to solve the reaction and how it was relevant to our next lab. 


8H+(aq) + 2NO3(aq) + 3Cu(s) ➝ 2NO(g) + 4H2O(l) + 3Cu2+(aq)


          The next day, we worked on a POGIL regarding the new topic of Lewis Structures with our table members. This POGIL taught us the basics of how to draw valence electrons for groups IA-VIIIA, how to calculate the total number of electrons and valence electrons in a model, and how to actually draw a Lewis structure. The POGIL helped tremendously with the lecture quiz due that night. One very useful resource I liked from the Lecture was the rules on how to create a Lewis structure as seen below.


          The next day, we began our lab to determine the mass percent of copper in a brass screw. We calculated the mass of the screw and the volume of nitric acid that was needed to react with the brass screw in the solution. We then measured the absorbance of the copper solution through a colorimeter to help us find the final mass percent of copper in the brass screw. Following this lab, we worked on two different POGILs on Bond Order and Bond Strength as well as a second one further explaining Lewis structures. These taught us about the different types of bonds in a Lewis structure, what a bond order is, and which bonds were the strongest. These two POGILs along with the powerpoint below helped me a lot when I tried to figure out how to do our second lecture quiz this week. Our last assignment this week was a VSEPR Theory Lab which we did not complete. Although we did not complete it, it helped us get a basic understanding of the lecture quiz due that Sunday.


          Overall, I learned a lot of material this week but do not feel completely confident in my ability to make every Lewis structure. Many parts of the POGILs are confusing to me but I feel that I do have a good grasp on the material as a whole. My participation this week was pretty good but again it can always be better. I believe the only thing I need to work on is just looking over the POGILs and lectures until I can fully understand each concept. Who knew making dots and lines could be challenging?


Monday, September 30, 2013

Week Three: 9/23-9/29 - Stoich Test and Intro to Lewis Structures

          This past week, our primary event was our second large test (First to do with stoichiometry) on Wednesday. We used Monday and Tuesday of this week reviewing significant material for the test in class. Following the test, we were introduced to the basics of Lewis structures on Thursday and Friday. This basic information helped us to complete a brief lecture quiz due Sunday night. 
          The week began on Monday with a little review on the concepts we learned throughout the past month regarding stoichiometry. Some on these included Theoretical Yield, Actual Yield, Mass Percent, Limiting Reactants, and Empirical Formulas. We went over a lot of material as a class with whiteboards on Monday while Dr. J assigned us three, multiple-choice, review quizzes online for us to do without a calculator online as homework. These quizzes were fantastic prep for the test and almost completely covered all of the concepts we needed to know on the multiple-choice part of the exam. Given below is a brief lecture covering how to do the math portion of the exam without a calculator. It even hinted a little at the formulas we may have needed to know for the test.


          The day before the big test, we worked on problems very similar to the quizzes he assigned for us to complete by Tuesday night. This in class review helped me out tremendously especially regarding the problems I was very puzzled on. We mainly focused on reviewing problems that had to do with Masses and the Mole but we eventually got a solid few minutes to review Chemical Equations, Stoichiometry, and Stoichiometric Applications further in depth. Overall, the test had a better outcome than I expected but I still was not particularly satisfied with my final score. I should dedicate more time to reviewing for the exam earlier in the week before the next big test.
          Following the test, we worked all day on Thursday and Friday in table groups on a POGIL activity explaining the basics of Lewis structures and covalent bonds. We stopped periodically throughout the POGIL at various points in which as a class we proceeded to white board and go over the more important answers. Learning the concept of drawing Lewis structures became much easier with the POGIL explaining it in a simple and concise way. The image below makes it very easy to understand what a covalent bond is and also very easily shows us how to draw a Lewis structure.
          Lewis structures have a very basic format and are just as easily formed. It is very important though to remember the rules of the Lewis structures when creating them. The image below briefly gives the two most important rules when making a Lewis structure.
          As you can see, this week mainly consisted of reviewing for the test on stoichiometry but also featured a two day introduction to Lewis structures. My participation in class this week was overall very good. I believe I heavily contributed to everything our group and class did this week. I do not particularly have any questions on what we learned this week, I understood the concepts pretty well. Overall, I am very comfortable with my understanding of what we learned this week. I feel very confident that I know almost all of the information very well. I could still work on mastering stoichiometric problems but overall I feel I am alright where I am regarding those. My only question would be, where do we go from here? 


Sunday, September 22, 2013

Week Two 9/16-9/22: Stoichiometry and Empirical Units

         This week, our main focus was on continuing to perfect our knowledge of stoichiometry. We worked through the worksheets of Stoich 3-8 either as a class with white boards or at home using the online lectures to guide us. By the end of the week, we also were introduced to the concepts of Empirical units and molecular formulas. These concepts were presented in class through a college level POGIL which we worked on together in groups and through two worksheets we did for homework.
         
          The beginning of the week started off primarily with review from the week prior, calculating the amount of grams in different substances using the Mole Ratio. As the week progressed, we began to learn newer concepts of stoichiometry such as the limiting reactant and the reactant in access in an equation. This concept was first explained to us using an analogy with car parts in a POGIL. The remaining tires would serve as the excess reactant whereas the one engine provided necessary to build the car served as the limiting reactant. The image below explains the concept in more depth.
          We applied this concept in class when we completed a worksheet dealing with reaction particles in different diagrams. We balanced the chemical equations and then built different molecules based on the reactants given and the products needed. This worksheet at least gave me a better understanding of what limiting and excess reactants really are. Stoich 7 then only strengthened our skills in solving for the limiting reactants in chemical equations with extra practice problems.
          
          From there, we learned a entirely new concept with Theoretical and Actual Yield. We learned that Theoretical Yield has to do with the maximum amount of product possible from the reactants given where Actual Yield has to do with the measured or actual amount of product from the reactants. Calculating the percentage yield, as seen in the formula below, is quite basic and did not take long for me to comprehend.


          Towards the end of the week, we began to learn about the empirical formula, empirical units, and the molecular formula. We were introduced to the concept in class but the first worksheet (Empirical Formulas 1) and corresponding lecture really helped me grasp the concept much better. The lecture for the worksheet can be seen in the link below. Our class then was given a worksheet over the weekend in which we learned how to calculate the molecular formula through an online lecture. 

          All in all, this week was almost fully based on learning the new concepts of stoichiometry with a little review here or there complemented by an introduction to the empirical formula. I believe my participation this week was better than last week in terms of contributing to our group's white board answers during our class discussions but I can always strive to be better. I still am slightly confused on how to get the empirical formula when trying to calculate the molecular molar mass but I'm guessing I may just need a bit more practice on those types of problems. Overall, I believe I have a very good understanding of the concepts we learned this week though. 


Sunday, September 15, 2013

Week One Blog Post

          This week we learned the basics on a few topics such as the Mole, stoichiometry,  and dimensional analysis (or conversions for short). We also dove into our very first lab this week on the relationship between absorbency and the concentration of a liquid. The main focus of this week though was molarity. Molarity tied together each of the basic lessons we learned this week and helped us use each to complete various parts of the lab.
           The week started with two lecture quizzes, one on the mole, one on dimensional analysis. We learned that a mole is basically the total amount of atomic mass of each element in an equation added together. We also learned that the molar mass of each chemical equation is the atomic mass of that equation in grams. The dimensional analysis quiz taught us basic conversions we would need to know for the future like those below.
          We then worked with stoich problems filling out two worksheets by learning the basic concept of the mole ratio. The mole ratio was very easy for me to comprehend because I am much more number-oriented then word-oriented. These equations we dealt with in these worksheets did just that. That same day we also worked on a lecture quiz on Molarity. The main concept from this lecture was that a solution's Molarity(M) = moles of the solute/ liter of the total solution. This concept was a main factor in completing the lab we did the rest of the week. Another huge concept from that lecture was that volume is dependent upon a solution's temperature. We learned that if the temperature of a solution went up, so does the volume, but the molarity of the solution will then decrease. The link below gives a better understanding on this subject.


          The last thing we did this week was a lab on the relationship between the concentration of a solution and the amount of transmitted light through the solution. After breaking off into groups, we tested many different dilutions of a liquid called blue #1, finding the absorbency and concentration of each liquid. We then performed the same test on Powerade and G2 samples to determine their absorbency. The data from these experiments led us to create a linear relationship between the concentration of each solution and the amount of transmitted light in each solution. This lab combined all of the things we learned this week and rolled them into one big experiment.
          Overall, my participation in class and other such things have been pretty good this week. Rating my understand of the unit on a scale of 1-10, I would probably be right around a 7.5. I understand most of the material, but some of the conversions and equations still very much confused me. I was mainly confused on the equations in the third lecture quiz and lecture on Concentration Molarity. I think I just need a little more experience dealing with those kinds of equations and I'll be A-Okay. I need to continue to drill into my head the basic principle of molarity as measuring the moles of a solute over the liters of a solution. Besides that, I have no new questions from this week's lessons.