Monday, February 10, 2014

Equilibrium

This past unit has been very eventful. We have covered everything there is to know about equilibrium from Le Châtelier's Principle to its connection with Thermodynamics. Equilibrium is basically another term for reversible reactions. This means the reaction is constantly forming products from reactants as well as reactants from products. When we work out these equations, we usually separate them into sides, left for reactants, right for products. In actuality, there are no distinct sides in a reversible reaction because these reactions are intermingled with each other in a container. Equilibrium is reached when the forward and reverse reactions equal each other.

Calculating the equilibrium of a system is actually pretty simple. We use the equilibrium constant, Keq, to evaluate these reactions. In order to calculate Keq, follow the link here and look at slide 13. Basically, it is merely products/reactants. There are two main forms of Keq. They are Kc and Kp. Kc has to deal with with concentrations and is constant for concentration of moles. Kp however is constant for the pressure of the system. Temperature is the only factor that can affect K in any way.

Many of the main concepts of equilibrium can be seen in the picture below and all have to do we Le Châtelier's Principle. According to his principle, we can see that if you increase the moles of a reactant, the equilibrium shifts right and the other reactant's moles decrease. The same goes for products. This is very similar to the reverse process in that when the moles of a reactant decrease, the equilibrium shifts to the left side and the other reactant's moles increase. The same goes here for decreasing products.


There are also other factors that will either make equilibrium shift to the product side or reactant side. Adding heat to a reaction can alter the equilibrium as well depending on the type of reaction that is taking place. If the the reactions is endothermic and you add heat, the reactions will shift to the product side or right side. If the reaction is exothermic and you add heat, the equilibrium will shift to the reactant side or left side. This is very similar to adding moles in a reaction. An endothermic reaction needs heat to react and form product, so therefore heat is on the reactant side in that situation. An exothermic reaction creates heat in the product, so therefore heat is on the product side in that situation. Lastly increasing pressure of a reaction cause the reaction to shift to whichever side has less moles. This attempts to balance out the products and reactants. If you decrease pressure the reaction will shift to the side with more moles or the more condensed molecules. Moles of reactions are judged by their stoichemetric coefficients. 

Overall, this unit does not seem very difficult. My participation in class has been very good the past few weeks and I hope to see an improvement on my test scores because of that. I feel very good about the material overall and I feel I have a very good grasp on all of the concepts at hand. The equilibrium worksheets really have helped me to figuring out how to solve problems that do deal with equilibrium. The concept test questions are still pretty difficult but I feel like if I study and review them properly, I should have no problems on the next test!

Tuesday, January 21, 2014

1/13-1/20: Gases

This past week was a very eventful one. It feels very strange to be writing a blog after not having to write one for such a long period of time. Alas, this past week to week-and-a half, we covered a vast majority of the Gases unit and are just about ready to finish it. The main areas we covered were KMT, Partial Pressures and Mole Fractions, and Real Gases. We also covered Ideal Gases and how to calculate them as well.

Last week, we had just previously learned about Real Gases and several key formulas we needed to know about them. These formulas include Charles Law, Boyle's Law, Gay Lussac's Law, Avogadro's Law, the Combined Gas Law, and the Ideal Gas Law. We used these formulas to solve basic problems involving mass or the moles of an reactant/product, volume, pressure, and temperature. A list of these formulas can be found at the link below. This list also includes Dalton's Law of Partial Pressures and Van Der Waals's equation.


After learning about gas laws and how to calculate these different problems, we dove into a new topic called KMT or Kinetic Molecular Theory. Here, we learned about the Main Tenets of KMT such as they have negligible volume as well as negligible attractive and repulsive forces. We also learned that smaller molecules have a larger root mean square speed than larger molecules. One of the bigger concepts we learned with KMT though was effusion, the escape of tiny gas particles through a small hole in space. We could also see larger molecules generally effused out of a substance much slower than smaller particles did. this can be seen in Graham's Law of Effusion shown below.


We finished out the week learning about Real Gases and what makes a gas stray from ideal behavior. We looked at how we could see this separation using the van der Waals equation. This equation had several parts (such as "a" and "b") that allowed us to further understand how theses gases may stray from ideal behavior. On Thursday, Dr. Finnan conducted an awesome demonstration using Liquid Nitrogen that was renowned by the entire class as one of the coolest things they've ever seen.

Overall, we learned a lot of new concepts and important information regarding Gases over the past few weeks. I still have a few unanswered questions regarding some of the key concepts but once I prepare for the Wednesday test by reviewing the PowerPoints and Hotpots, I'm sure the information will become much more clear. My participation in class these past few weeks has much improved from previous weeks but is still something I really need to work on moving forward. On a scale of 1-5, I would rate my understanding at a 4 of the information we've learned over the past few weeks. I need to study pretty hard this week in order to be prepared for the test. Once I review these formulas for Partial Pressures as well as the basic concepts, I should be able to master all of this material.

Monday, December 16, 2013

Dec. 15th- Entropy, Enthalpy, and much more

We're back! Since the start of the 2nd Trimester, we have been learning many new and intriguing concepts. We started off learning a little bit about Thermochemistry and Bond Enthalpies. We learned about the four ways to calculate a certain bond enthalpy and whether these processes are endothermic or exothermic. We then learned all about bond entropy and Gibbs Free Energy. Along the way, we learned about Aqueous solutions and Precipitation reactions also.

The first thing we learned about in trimester 2 was the concepts of thermochemistry and bond enthalpies. We learned that enthalpy is practically the heat lost or gained in the system as seen below.
When the change in enthalpy is positive, the process is endothermic as opposed to negative change identifying with the process as exothermic. We also learned four methods to find the change in enthalpy. These four ways were discussed very in depth over a serious of Lectures and Lecture Quizzes. The formula using average bond energies was simply the (positive) Total Bonds Broken plus the (negative) Total Bonds formed. The res of the formulas can be found with their correlating Power Points at the links below.

Calorimetry Formula
Hess's Law and Enthalpies of Formation


We then went on to learn that entropy is a measure of the most probable distinguishable microstates or degrees of freedom available to a system. To calculate the change in entropy, you simply find the sum f products minus the sum of the reactants with stoichiometric standard entropies. We also found out how to find whether a reaction was spontaneous of not by the table below. The formula for Gibbs Free Energy can also be seen below.


We then went on to learn about Precipitation reactions and Net Ionic equations. To find these Net Ionic equations, you basically find the elements that are soluble in water and take them out of the equation leaving only the reactants that are insoluble in water. Some soluble compound include Na+, K+, NH4+, and NO3+.

Overall, we learned a lot of new concepts and important information on Entropy and Enthalpy over the past few weeks. I still have a few unanswered questions regarding both concepts but once I prepare for the Friday test by reviewing the Power Points, I'm sure the information will become much more clear. My participation in class these past few weeks have not been very good at all and is something I really need to work on moving forward. On a scale of 1-5, I would rate my understanding at a 3 of the information we've learned over the past few weeks. I need to study pretty hard this week in order to be prepared for the test. Once I review these basic concepts, the test should be a piece of cake!

Monday, November 11, 2013

11/10


This week, we learned many different concepts from Vapor Pressure to Lattice energy to Liquids and Solids. We also continued to learn about how the IMF forces affected these basic concepts and what other forces or bonds held these molecules together.

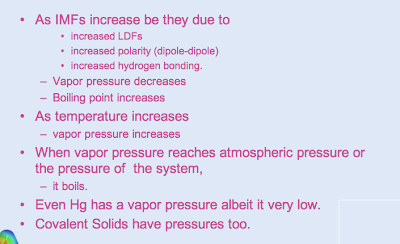
The first main concept we learned about was vapor pressure. Vapor pressure is the amount of gas of a compound that is in equilibrium with the liquid or solid. This means that if IMFs are weak in the compound, molecules can more easily break out of the liquid or even solid into the atmosphere. This concept of vapor pressure is used to explain why water evaporates when left out for a few hours. The link and images below give a better in-depth description of what vapor pressure is and what are some common trends that go along with it.


IMFs and Vapor Pressure in Depth


Later on in the week, we learned about Lattice energy in molecules. Lattice energy is the amount of energy required to completely separate a mole of a solid ionic compound into its gaseous state. The main things to know about Lattice energy is that it increases with the charge on ions and decreases with the size of these ions. Also, as Lattice energy goes up, so does the element's boiling point.

The last thing we learned about this week was about the conductivity of different compounds and their correlation with trends such as boiling point and melting point. We conducted a whole lab testing the conductivity of different substances and engaged in a rather large discussion over these concepts. We learned that testing the conductivity of a substance is really only testing the ability of the electrons in that substance to move. We worked with our table groups to complete the lab and settle any unresolved questions.

Overall, this week flew by pretty quickly. My participation this week hasn't been as great as it could be and I need to work to improve that in the upcoming weeks. I am quite nervous for the test on tuesday because I am not entirely sure about all of the concepts we will be tested on. I do not know the material very well and will need to study pretty hard tomorrow to get all of these concepts. The end of the tri is looming over us and I cannot be more excited!!!


Monday, November 4, 2013

11/4


This week, we learned all about intermolecular forces. We completed a few POGILs this week on Intermolecular forces and Water learning about the four different types of intermolecular forces while also learning what the difference between intramolecular and intermolecular forces were. During the week, we completed several lecture quizzes on each of the four different types of intermolecular forces. As the week came to a close, we began working on the Lecture 23 worksheet and were introduced to liquids and solids.

The first thing we learned about in this unit was the various types of intermolecular forces. We spent two days reviewing a POGIL and had multiple lecture quizzes on this subject because it is so important.  This POGIL first taught us the correlation between increasing molecular weight and increasing intermolecular forces with increasing boiling point of molecules. It also taught us the difference between intermolecular and intramolecular in that intra means within a molecule where inter is bonding two molecules together. The POGIL also introduced us to the 3 main types of intermolecular forces which are hydrogen bonding, dipole-dipole forces, and induced dipole-induced dipole or London Dispersion Forces. Links further explaining each of the forces further in depth are listed below.


The strongest of the forces, Hydrogen bonding, was a huge focus in the lessons this week. We learned all about the different types of forces present in each molecule. The pictures below illustrate the strengths of the different forces, an example of some molecules with multiple charges, and a little explanation of what hydrogen bonds really are. As seen below, London Dispersion forces are found in every compound. However, dipole-dipole forces are only found when there is a dipole in the molecule whereas there must be and O, N, or F present next to the H atom for Hydrogen bonding to occur. Dipole-induced dipole forces are not very commonly found s we id not really address them this week.


The water POGIL helped us get a very good interpretation of what hydrogen bonds are, when, and where these hydrogen bonds occur. We spent only a few days working on it though before moving into liquids and solids which we started this weekend. We completed a lecture quiz on both liquids and solids on Sunday and I believe we will go much further in depth with that subject next week.

Overall, my participation this week was very good. I understand most of the concepts from this week pretty well besides the Dipole-Induced Dipole forces. Those were very confusing to me. I think I still need to work on memorizing the charges and their properties a little bit more. I am excited to see where we move on to next week!


Monday, October 28, 2013

October 20 - October 25

This week was a very jam-packed week for us Chemistry students. We began the week with a slight review which transitioned us to our test on Polarity and Electron/Molecular domains. After our test on our bonding unit we had a nice relaxation day in which we enjoyed Mole Day. Later in the week, we got back down to business with a pretest/practice AP test, and finished off with two POGILS on the Ionic Bond and Metals.

To review for the the test on Tuesday, we worked on a review packet (found below) we were given over the weekend and even white-boarded a few problems as a class. We also had further review materials online. Some of these included our past lectures, the answers to different POGILS, and even extra review with Hotpot quizzes. The following day, we took the test. Overall, it was not too challenging. The questions were slightly difficult and I made many stupid mistakes, but I knew most of the material pretty well overall. 


From there, we moved on to celebrate Mole Day (which unfortunately I was absent for :( ). From what I heard, it was a very exciting day filled with cookies and hot chocolate . This day wasn't all fun and games though. We were given an article that day on the chemistry of paintball and were assigned to write an essay about the importance of polarity and hydrogen bonding in the paintball. This article not only introduced us to polarity and hydrogen bonding, but also gave us a fun and great way to learn about it through something we could relate to. 


We then finished off the week completing two POGILS. Whatever work was not completed in class was assigned for homework. These also helped us to complete a lecture quiz on Metals due that Sunday night.

Overall, this was a week of stress and enjoyment in many forms. My participation overall was pretty good this week. I think I have a very good understanding of the few concepts we learned in this transition week. I am very interested in the chemistry of metals so I am excited to see what we move on to from here!


Monday, October 21, 2013

Hybridization, Sigma/Pi bonding, and WebMo molecules

This week was a very eventful one in Dr. J's classroom. We learned how molecules can be classified using hybridization, what sigma and pi bonding is, and then progressed to complete the VSEPR lab with its new addition of the WebMO molecular models lab. We also reviewed some concepts such as polarity and the dipole moment that weren't very clear before. These concepts were very necessary knowledge we needed to comprehend moving forward towards our test on Tuesday.

Hybridization surprised a lot of people. I had no idea what this was just going off the information from the lectures. As we worked through it in class though, Dr. J came up with a very simple and easy way for me to tell a molecule's hybridization. All we really needed to do was look at our given molecule's central atom. This atom would give us all the information we needed to know. To find the hybridization of a molecule, you need to only look at the number of electron domains in the central atom. If it had two electron domains, the hybridization would be sp.  If it had three electron domains, the hybridization would be sp2. If it had four electron domains, the hybridization would be sp3. You an only classify molecules through hybridization through four electron domains, so if a molecule had 5 domains, you could not classify it through hybridization. Examples of hybridization in molecules different types of molecules be seen below.

Sigma and Pi bonding was also another very confusing subject. The lecture also gave me absolutely no help whatsoever as to comprehending what these bonds are or how they are really formed. However, just as with hybridization, as we went over the concept of Sigma and Pi bonding in class, it became a whole lot more clear what Sigma and Pi bonds really were. Basically, a single bonded molecule would only have Sigma bonds dependent upon how many bonds you have. Take for instance, F2. F2 has one, single bond. This single bond indicates that there is one sigma bond present. A double bond however means that the molecule has one sigma bond and one pi bond. A triple bond on the other hand, indicates that the molecule has one sigma bond and two pi bonds. Take for instance the element C2H2 above. There are two single bonds and one triple bonds. The two single bonds indicate there are two sigma bonds. Add that to the one sigma and two pi bonds present in the triple bond, and you can see that C2H2 has 3 sigma bonds and two pi bonds. The powerpoint below can provide a little more assistance if needed.


The WebMO lab really cleared things up for a lot of people. This lab allowed us to create models of each of the thirteen molecules we had in our lab. Some of these included NSF, H20, and BeF2. From these models, we were able to tell a molecule's polarity, charge, dipoles, shape, and bond angles. The polarity could be seen looking at the molecule's colors when looking at the WebMO diagram. If symmetrical, the colors would indicate overall that the molecule was not polar. If not symmetrical though, the colors would indicate that the molecule is overall polar. We could tell the charge, dipoles, shape, and bond angles by just looking at the diagram and information listed below the model for most molecules.

Overall, I learned a lot about Hybridization, Sigma and Pi bonds, and gained tons of useful knowledge from the WebMO diagrams. My participation overall this week has been pretty good, especially in the WebMO lab. I would rate my understanding of the concepts this week at a 7 out of 10. I got a lot of the information, just not every single bit. I still need to work on the dipole moment of molecules because I am not quite sure how to calculate that still.